
Metallographic Preparation – Overview
The History of Metallography
The history of metallography dates back to the 19th century, when advancements in metallurgy led scientists to recognize the importance of the internal structure of materials in determining their performance. Early scientists, such as Henry Clifton Sorby, studied the metallographic structures of steel and discovered the impact of grain size, phase distribution, and inclusions on material properties. His research emphasized the close relationship between microstructure and macroscopic performance, which was groundbreaking in the field of material science at the time.

In modern material science, metallographic preparation techniques have become standardized procedures widely applied to the study of various metal and non-metal materials. These techniques are not only essential in quality control but also play a significant role in failure analysis and material development. Through metallographic analysis, researchers can assess the performance, quality, and suitability of materials, ensuring that products meet specified standards and regulations.
Definition and Importance of Metallographic Preparation
Metallographic preparation is a core technique in material science, primarily aimed at accurately observing the structures of metal and non-metal materials, which reveal their true properties. Material performance—including strength, toughness, and corrosion resistance—is closely linked to its internal microstructure. Therefore, proper preparation is crucial to ensuring the accuracy of the observation results.
The primary steps of metallographic preparation include metallographic cutting, metallographic mounting, grinding, and polishing. These steps ensure that samples are prepared for microscopic observation without altering the internal structures of metal and non-metal materials. Through these processes, the sample surface is refined to a smooth and flat state, making it suitable for detailed analysis using optical microscopes or scanning electron microscopes (SEM). These techniques are indispensable in quality control, failure analysis, and material research applications.
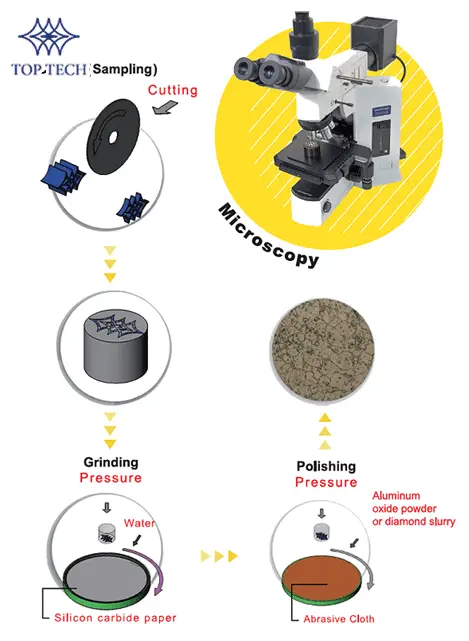
Metallographic Preparation – Step-by-Step Process
Cutting
1. Purpose of Cutting
Metallographic Cutting is the first step in metallographic preparation and is essential for the preparation of both metal and non-metal materials. The primary purpose of this process is to cut the material sample into representative sizes and shapes for subsequent observation and analysis of its metallographic structure. The key to cutting lies in avoiding the introduction of heat-affected zones or mechanical deformation during the process, as these may alter the microstructure of the materials and affect the accuracy of the analysis.
2. Importance of Cutting
(1)Avoiding Heat-Affected Zones
Excessive heat generated during the cutting process can cause phase transformations or structural changes in metal and non-metal materials. To prevent this, coolants are typically used to lower the temperature during the cutting process, ensuring that the microstructure of the material remains unchanged.

(2)Minimizing Mechanical Deformation
<ㄘ>The pressure and speed during sectioning must also be controlled to avoid excessive mechanical stress on the metal and non-metal materials, which could result in deformation or cracking of the sample. Using precision cutting machines effectively mitigates these risks, ensuring smooth and defect-free cut surfaces.(3)Choosing the Right Cutting Tools
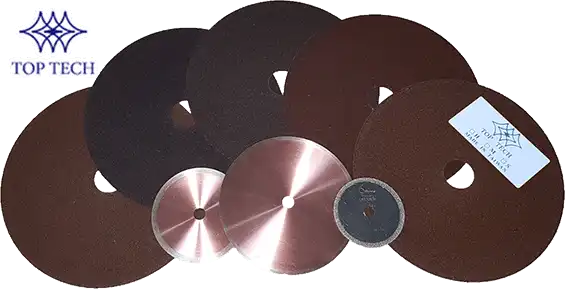
Different materials require specific cutting tools and methods. The choice of metallographic cutting consumables (such as grinding wheels or Diamond Blades) and cutting techniques (like Precision Cutting or Diamond Cutting) is critical to achieving high-quality sectioning. These tools are designed to minimize thermal and physical damage, maintaining the integrity of the sample.
3. Precision Cutting
Precision Cutting uses abrasives such as Aluminum Oxide Blades and Silicon Carbide Blades to minimize deformation during the cutting process. The characteristics of precision cutting include:
(1) Accuracy
This technique can achieve micrometer-level precision, making it suitable for high-value or high-precision materials such as electronic components and medical devices.
(2) Diverse Cutting Tools
Commonly used cutting tools include Aluminum Oxide Blades and Silicon Carbide Blades, selected according to the properties of metal and non-metal materials to ensure optimal cutting quality.
(3) Broad Applications
Precision cutting is widely used in industries such as semiconductors, electronics, and metal and non-metal materials, particularly in scenarios requiring high precision and detailed processing.
4.Diamond Cutting
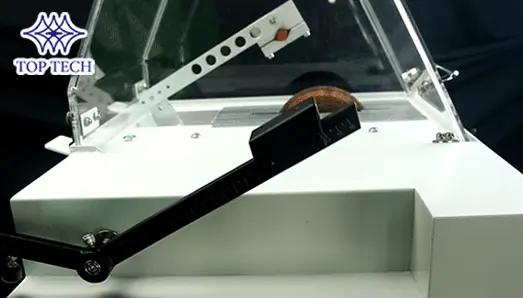
Diamond Cutting is designed for extremely hard materials, using Diamond Blades to achieve exceptional cutting precision. Its features include:
(1) High Cutting Precision
This technology offers excellent cutting results for brittle materials like hard alloys or ceramics, reducing material loss.
(2) Suitable for High Hardness Materials
Given the hardness of diamonds, this cutting method is ideal for difficult-to-process metal or non-metal materials and enables the cutting of complex shapes.
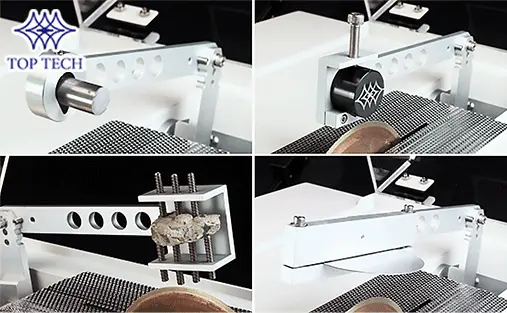
(3) Various Fixtures for Different Shapes and Sizes
Fixtures can be easily changed to accommodate the shape, size, and properties of the sample, providing greater flexibility.
▉▎Further reading: Understanding of Precision Cutting Machine- detailed types and functional specifications
▉▎Further reading: Understanding of Precision Diamond Saws- detailed types and functional specifications
Mounting
1.Functions of Mounting
Metallographic mounting involves encapsulating the cut metal or non-metal samples within a curing material to provide stability during subsequent grinding and polishing processes. This step protects the edges and surfaces of the sample, preventing damage during grinding and polishing, which is especially important for irregular or brittle samples.
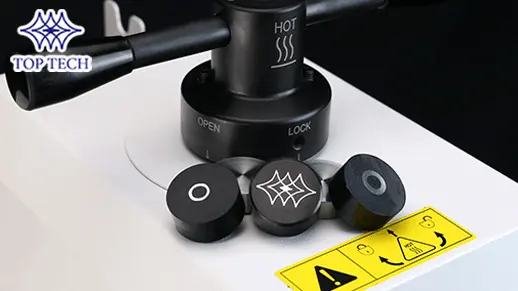
Its main functions include:
(1) Providing Stability
The primary function of mounting is to encapsulate the cut metal or non-metal samples within a curing material to ensure stability during grinding and polishing. This process effectively secures the sample, preventing displacement or damage due to external forces, particularly for irregular or brittle samples.
(2) Protecting Edges and Surfaces
Metallographic mounting protects the edges and surfaces of metal and non-metal samples, preventing edge rounding or other defects during grinding and polishing. This is crucial for samples requiring edge observation, as unmounted samples are prone to damage during grinding, affecting subsequent analysis results.

(3) Facilitating Handling
Mounted samples are easier to handle, especially during grinding and polishing. The cured material provides a smooth and stable surface, facilitating the polishing process and improving overall work efficiency.
(4) Standardizing Operations
Metallographic mounting also helps standardize workflows, ensuring consistent processing of different metal or non-metal samples. This is essential for laboratory quality control and ensuring data repeatability.
2. Hot Mounting
Metallographic mounting plays a critical role in metallographic preparation and can be divided into Hot Mounting and cold mounting. Hot Mounting uses thermosetting resins, such as acrylic or bakelite powders, to embed the sample through heating and pressure.

Its features include:
(1) Stability
Hot mounting provides stable samples with clear edges, essential for subsequent grinding and polishing processes. Once secured in resin, the sample is protected from deformation or damage during processing.
(2) Wide Applicability
This method is suitable for most metal materials, particularly those not affected by heat. The high pressure and temperature conditions in Hot Mounting ensure that the resin penetrates into the micro-pores of the sample, enhancing its overall stability.
(3) Process Efficiency
Hot Mounting typically requires a short time to complete, achieving good molding results in a single operation, which improves laboratory efficiency.
3.Cold Mounting
Cold mounting, on the other hand, uses cold-setting resins, such as epoxy, suitable for heat-sensitive or irregularly shaped non-metal materials.

Its features include:
(1) Avoiding Thermal Stress
Cold mounting does not require heating, avoiding thermal stress during the process and protecting the microstructure of non-metal samples, especially brittle materials.
(2) Easy Operation
The cold mounting process is relatively simple: the non-metal sample is placed in a mold, and mixed resin and hardener are poured in and left to cure. This makes cold mounting an efficient and user-friendly option.
(3) Wide Applicability
Cold mounting is suitable for various non-metal materials, particularly those prone to deformation or damage at high temperatures, such as electronic components or complex-shaped non-metal materials.
▉▎Further reading: Understanding of Metallographic Mounting-detailed types and functional specifications
Grinding
Metallographic grinding is a crucial step in metallographic preparation, primarily aimed at creating a flat and smooth surface on the mounted sample to prepare it for subsequent microscopic observation.
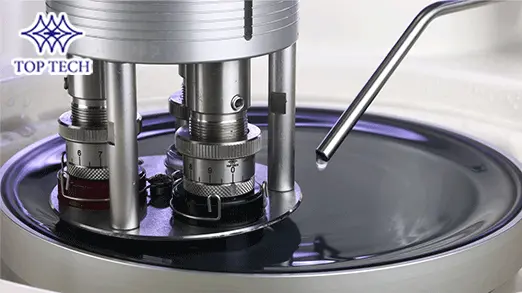
The metallographic grinding process typically consists of the following two stages:
1. Rough grinding
In the rough grinding stage of metallographic grinding, coarser abrasives are used to perform initial grinding, aiming to remove irregularities and significant defects from the surface of metal or non-metal samples. The characteristics of this stage include:
(1) Material removal
Rough grinding effectively removes excess material from the surface of metal or non-metal samples, laying the foundation for fine grinding.
(2) Tools used
Typically, coarser Silicon Carbide Grinding Papers or diamond abrasives are used. These abrasives have larger particles, enabling quick removal of uneven surface areas.
2. Fine grinding
In the fine grinding stage, the goal is to further smooth the sample surface, usually by using finer abrasives. The characteristics of this stage include:
(1) Smooth surface
Fine grinding removes the micro-scratches left from rough grinding, achieving a higher degree of flatness and smoothness on the surface of metal or non-metal samples.
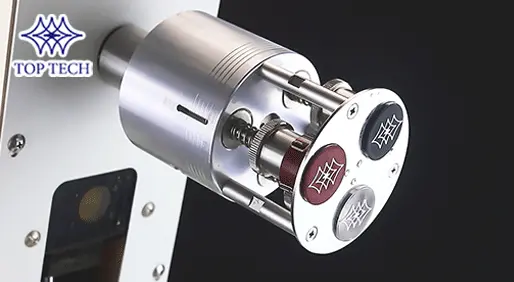
(2)Choice of abrasives
Finer Silicon Carbide Grinding Papers or diamond abrasives are selected to provide a more precise grinding effect.
Polishing
Metallographic polishing is a critical step in the preparation of metallographic samples, aimed at achieving a highly reflective surface for metal samples or a scratch-free surface for non-metal samples, facilitating the clear observation of internal structures under a microscope.
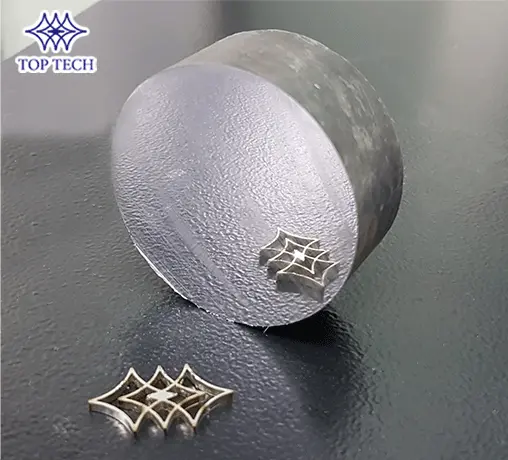
The key elements and materials used in metallographic polishing include:
1. Purpose of Metallographic Polishing
(1) Achieving a highly reflective surface
Metallographic polishing removes minor scratches and irregularities from the sample surface, making metal samples smooth and mirror-like. This is essential for the observation of metallographic structures, as the highly reflective surface clearly displays the sample's microstructure, aiding in the analysis of phase distribution, grain boundaries, and inclusions.
(2) Enhancing observation quality
Samples treated with metallographic polishing provide higher resolution under the microscope, enabling researchers to more accurately analyze material properties and structures.
2. Steps of Metallographic Polishing
Following the appropriate steps in metallographic polishing ensures that the surfaces of metal or non-metal samples achieve optimal smoothness and gloss. Typically, the polishing process consists of the following stages:
(1) Rough polishing
Coarser abrasives are used to remove significant defects and scratches on the surface.
(2) Fine polishing
Progressively finer abrasives are applied to further smooth the surface and eliminate scratches left by rough polishing.
(3) Final polishing
High-purity diamond or colloidal silica is used for the final polish to achieve a highly reflective surface.
▉▎Further reading: Understanding of Metallographic Grinding and Polishing-detailed types and functional specifications
Contact Us / Inqquiry
Metallographic Preparation – Testing & Analysis
Metallographic Analysis
Metallographic analysis is mainly used to understand the internal structure, performance, and potential issues of metal materials or non-metal samples. The observation and testing objectives vary depending on the application fields, covering metallographic structure observation, coating inspection, corrosion evaluation, structural analysis, and weld point assessment.
1. Observation of Metallographic Structures
Observing the metallographic structure reveals the internal structure of metal or non-metal samples, helping determine the properties of the material. Different materials have distinct observation goals:
(1) Graphite
Observing the morphology and distribution of graphite provides insights into the material's properties and offers a basis for optimizing its performance in various applications.

(2)Rocks
Analyzing mineral composition and structure is crucial in geology and building material applications.

(3)Aluminum
The metallographic structure of aluminum reveals its grain structure, which is especially critical for industries demanding high strength, such as aerospace and automotive.

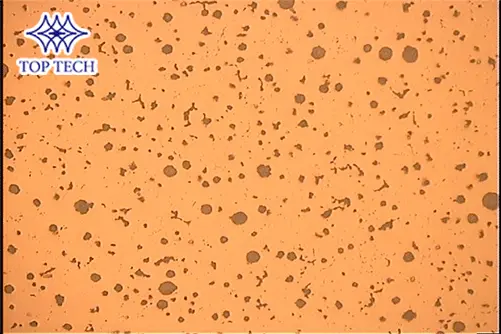
(4)Cast Iron
Observing the morphology and distribution of cast iron’s internal structure helps evaluate the toughness and strength of the metal.
2. Coating Observation
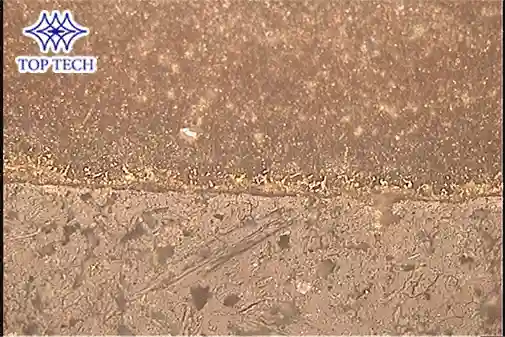
Metallographic coating is an essential method to enhance the surface performance of metal or non-metal materials. Coating observations help evaluate the thickness, uniformity, and adhesion of coatings and understand the bonding between the coating material and the substrate.
For tools like sockets, the quality of the metallographic coating directly impacts their wear resistance and corrosion protection.

3. Post-Corrosion Observation
The primary purpose of metallographic corrosion is to reveal the internal structure of the sample clearly, as untreated samples often have smooth, reflective surfaces that obscure microscopic details. The post-corrosion surface exposes the grain morphology, phase boundaries, and structural changes, which are essential for performance evaluation, process optimization, and defect analysis.
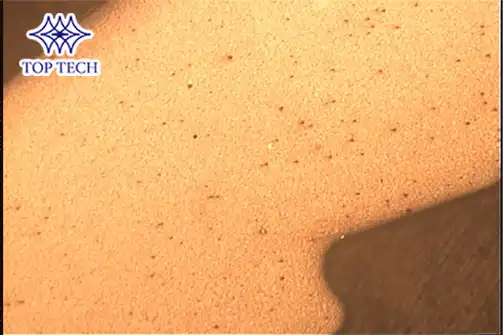
(1)Socket
Post-corrosion, the grain structure of the socket material is clearly visible, aiding in the analysis of its strength and toughness.
(2)Springs
Corrosion analysis helps explore the internal structure of spring materials.
4. Structural Analysis
Metallographic structural analysis evaluates both the internal and external structure of metal materials or non-metal samples, including:
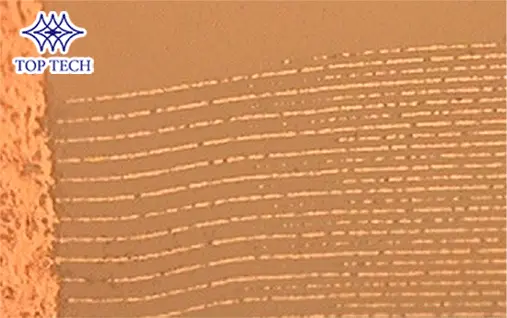
(1) Passive Components and Inductors
Structural analysis of such electronic components ensures their stability and durability.
(2)Threads
Thread structure analysis ensures the strength and precision of connectors, preventing failures under high pressure.
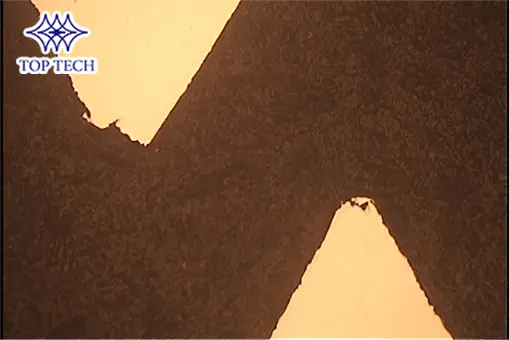
5. R-curve Radius Analysis
The R-curve radius, or fillet radius, is crucial for connectors and other metal components. R-curve analysis optimizes structural design, ensuring adequate contact area and strength, enhancing reliability.
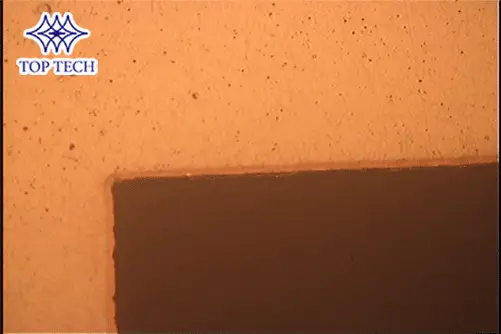
6. Surface Contamination Testing
The cleanliness of a material's surface is a key factor influencing its performance, especially for high-performance metals like titanium. Surface contamination tests evaluate whether the material has been affected by environmental or processing pollutants, ensuring corrosion resistance and biocompatibility.
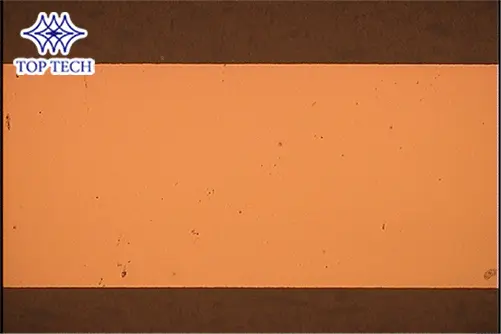
7. Pin Contact Analysis
Pin contact analysis is crucial for electronic parts. Poor pin contact can lead to electrical performance degradation and even short circuits. This analysis observes whether the pin contact with the substrate is even and stable.

8. Weld Joint Analysis and Weld Point Evaluation
The quality of weld joints directly impacts the lifespan and stability of electronic products. Metallographic weld joint analysis and circuit board weld point evaluations identify defects such as cracks or voids to ensure welding quality and prevent early failure.
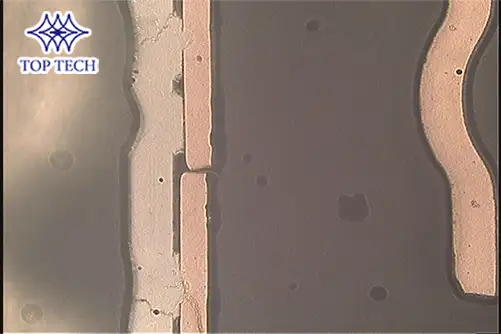
9. Defect Analysis
Small defects in materials can cause significant failures, especially in high-precision applications. Metallographic defect analysis of components like resistors ensures their long-term stability.

10. Composite Material Testing
Testing techniques for composite materials are becoming increasingly important, particularly for new materials like carbon fiber. Metallographic composite material testing reveals layered structures and interfaces, ensuring strength and durability.

11. Inclusion Analysis
Inclusions are potential contaminants during the manufacturing process, particularly for metals like copper used in high-conductivity applications. Metallographic inclusion analysis identifies foreign matter introduced during processing, ensuring the purity and performance of the metal.
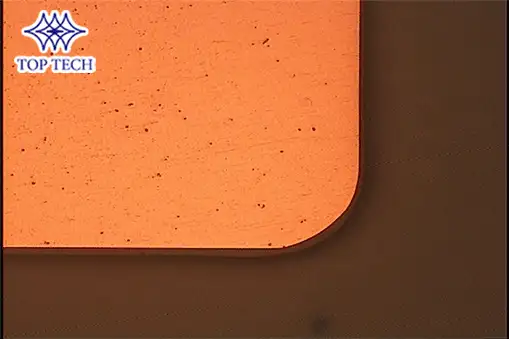
12. Hardness Testing
Metallographic hardness testing is a key method for evaluating the mechanical performance of metal materials. Hardness testing of steel balls helps determine wear resistance and load-bearing capacity, essential for assessing the performance of high-precision mechanical components.

Metallographic Preparation – Equipment & Tools
In metallographic analysis, microscopy techniques enable researchers to observe and analyze the macro and microstructures of metal or non-metal materials. Depending on the observation needs and sample characteristics, commonly used microscope tools mainly include optical microscopes and Scanning Electron Microscopes (SEM).
These two types of microscopes each have unique features, briefly described below:
Optical Microscope
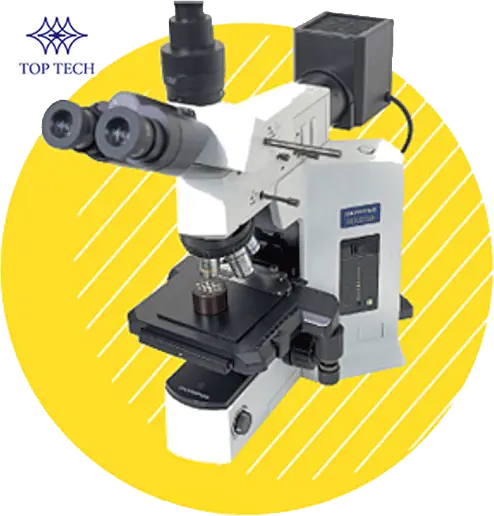
The optical microscope is the fundamental tool for observing metal and alloy samples, with the following features:
1. Macroscopic Structure Observation
At low magnification, the optical microscope reveals the macroscopic metallographic structure of the metal sample, helping researchers quickly grasp the overall characteristics of the metal material.
2. Metallographic Structure Analysis
At high magnification, the optical microscope can observe fine metallographic structures, which is crucial for analyzing metal grains, phase structures, cracks, and inclusions.
3. Reflected Light Observation
The optical microscope primarily uses reflected light to observe the surface of polished and corroded metal samples, making it highly effective in metallographic analysis, as it clearly displays surface features and defects of the sample.
The optical microscope is relatively easy to operate and cost-effective, suitable for the observation and analysis of a variety of materials. It is widely used in fields such as material science, engineering, and biology.
Scanning Electron Microscope (SEM)
The Scanning Electron Microscope (SEM) is a high-resolution microscope suitable for observing the microstructural details of metal or non-metal samples. Its features include:
1. High Resolution
The SEM offers higher resolution than optical microscopes, enabling the clear display of the material's micro-morphology and structural characteristics. It is particularly suitable for analyzing very small metallographic structures, such as sub-micron-level inclusions, pores, and grain boundaries.
2. Electron Beam Scanning
The SEM scans the surface of metal or non-metal materials using an electron beam, generating high-resolution images. This process reveals the surface characteristics and internal metallographic structure of the sample, providing rich morphological information.
3. Versatility
In addition to morphological observation, the SEM can also perform elemental analysis, making it valuable in material science and failure analysis.
Contact Us / InqquiryMetallographic Preparation – Summary
Metallographic preparation and metallographic analysis have become integral to many industrial sectors, including the evaluation of materials for extreme environments in aerospace, fatigue life analysis in the automotive industry, weld quality control for electronic components, and corrosion resistance testing for building materials. In these high-precision applications, the in-depth observation of microstructures through optical microscopes and Scanning Electron Microscopes (SEM) allows for the accurate analysis of grain interfaces, inclusions, and welding defects. Every minor flaw identified can prevent product failures and even avert catastrophic consequences that could endanger lives.
The profound significance of metallographic techniques lies not only in ensuring product quality but also in laying the foundation for industrial competitiveness. With continuous innovations in manufacturing processes—ranging from Precision Cutting with high-hardness diamonds to Hot Mounting Press and cold mounting processes—each technological breakthrough expands the boundaries of material analysis, allowing the once-inaccessible microscopic world to come to light. This not only advances failure analysis and new material development but also grants scientists greater freedom, paving the way for future material innovations.
Contact Us / InqquiryRecommended Reading
▉▎Metallographic Preparation Steps 2026|Got it in 3 minutes!
▉▎Metallographic Cutting Selecting 2026|5 Key Considerations
▉▎Metallographic Mounting Selecting 2026|5 Key Considerations
▉▎Metallographic Grinding and Polishing Selecting 2026|5 Key Consideration
Recommended Products
▉▎Highly Favored by Government and Academic Institutions, Achieving Precision of Up to 0.01mm! (CLM50)
▉▎Fully Automatic Mounting Press: The Top Choice for Research and Quality Control. (ML-L1A)
